Irresistible No-Bake Banana Pudding Bars
Table of Contents
Introduction to Irresistible No-Bake Banana Pudding Bars
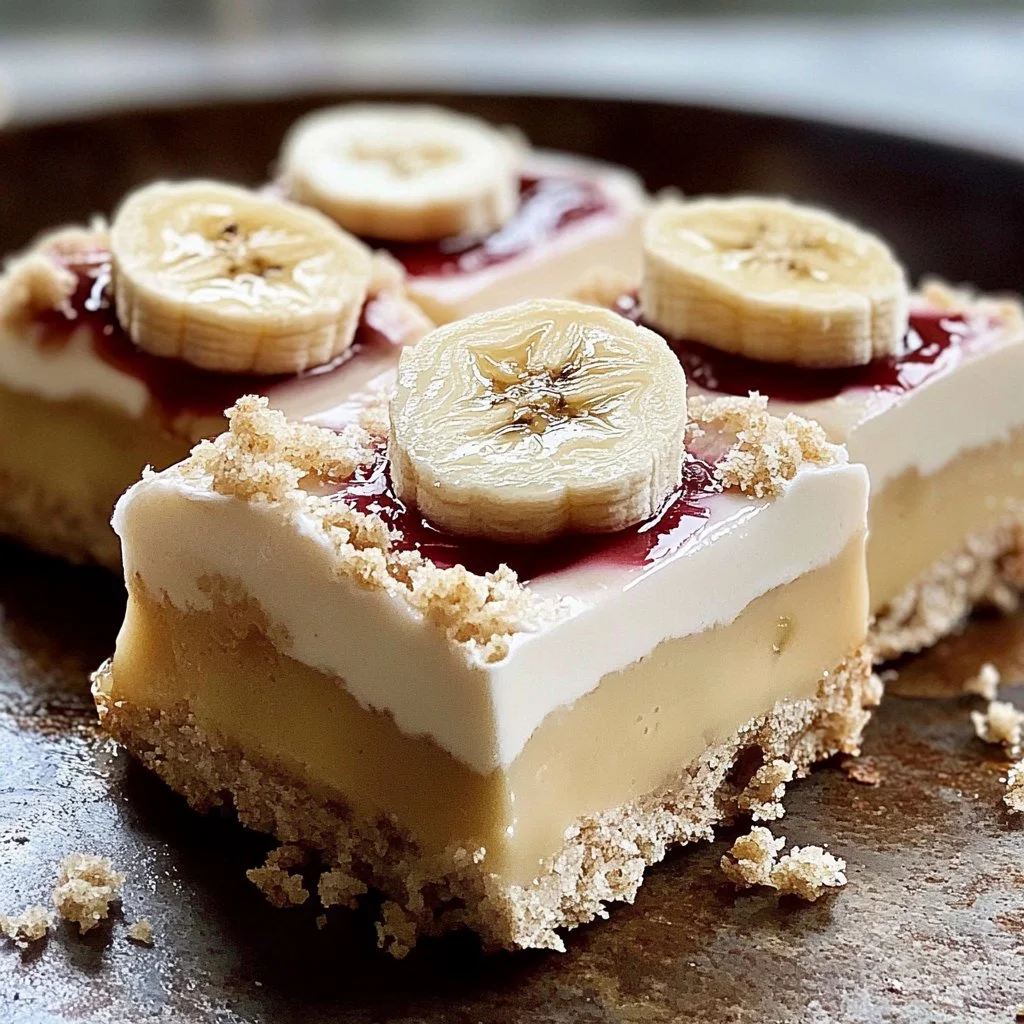
Have you ever craved dessert but felt too lazy to turn on the oven? If so, then you’re in for a treat with these Irresistible No-Bake Banana Pudding Bars. This delightful recipe is a game-changer, perfect for those warm days when a heavy dessert seems overwhelming. With layers of creamy banana pudding, fresh bananas, and a crunchy vanilla wafer crust, these bars are a dream come true for anyone with a sweet tooth.
What sets these Irresistible No-Bake Banana Pudding Bars apart is their incredible simplicity. You don’t need to be a professional chef or have advanced baking skills to achieve sweet, creamy perfection. They’re refrigerator-cold, refreshing, and perfect for any occasion. Whether you’re hosting a summer barbecue, attending a potluck, or simply treating yourself at home, this dish is sure to impress.
Do you love the combination of flavors and textures? The luscious pudding contrasts beautifully with the crunchy crust. Plus, it’s customizable; you can add your favorite fruits or toppings to create your personal spin. Have you got ripe bananas hanging around at home? This is the perfect way to put them to good use. With just a handful of ingredients and minimal prep time, these bars are bound to become your new favorite dessert.
Key Benefits of Irresistible No-Bake Banana Pudding Bars
Why You’ll Love This Recipe
- Quick and Easy: No baking required! Assemble and chill for a stress-free dessert.
- Delicious Layers: The combination of banana, pudding, and vanilla wafers creates a mouthwatering taste experience.
- Customizable: Add your favorite fruits or chocolate for a unique twist.
- Perfect for Occasions: Ideal for summer picnics, parties, or just a sweet treat after dinner.
- Kid-Friendly: Simple enough for kids to help out, making it a fun family activity.
What Makes It Stand Out
The beauty of Irresistible No-Bake Banana Pudding Bars lies in their flexibility. You can easily adjust the ingredients to cater to your preferences. Want a chocolate twist? Add cocoa powder or chocolate pudding. Looking for something a bit tangier? A sprinkle of lemon juice over the bananas adds a delightful zing. These bars are fantastic for various occasions, from casual family gatherings to elegant dinner parties—no one can resist their charm.
Ingredients for Irresistible No-Bake Banana Pudding Bars
Complete Ingredient List with Measurements
- 1 package of vanilla wafers
- 2 cups of banana pudding (prepare according to package instructions)
- 2 cups of whipped topping (store-bought or homemade)
- 2-3 ripe bananas, sliced
- Cherries for topping (optional)
- 3 tablespoons of melted butter (for crust)
Substitutes and Alternatives
If you have dietary restrictions or allergies, don’t worry! You can make some easy swaps. For a gluten-free version, choose gluten-free vanilla wafers. If you’re dairy-free, consider using non-dairy whipped topping and plant-based pudding mixes. Craving a vegan alternative? Use coconut cream instead of whipped topping and ensure your pudding mix is vegan-friendly.
How to Make Irresistible No-Bake Banana Pudding Bars – Step-by-Step Directions
Step 1 – Prepare Ingredients
Begin by gathering all your ingredients to keep things organized. Crush the vanilla wafers using a food processor or by placing them in a ziplock bag and smashing them. Melt the butter, either in the microwave or on the stovetop, and set it aside.
Step 2 – Cook the Base
Combine the crushed wafers with melted butter in a mixing bowl. Toss everything together until the wafers are fully coated. Now, press the mixture firmly into the bottom of a greased pan, forming an even crust. This step is crucial for a sturdy base.
Step 3 – Prepare the Banana Pudding
In a separate bowl, prepare the banana pudding according to the package instructions. Stir constantly until it thickens, usually taking about 2-3 minutes. The consistency should be creamy but able to hold its shape slightly.
Step 4 – Pour Pudding Over the Crust
Once the pudding is ready, pour it over the vanilla wafer crust. Using a spatula, carefully spread the pudding evenly across the top. This layer should be substantial, ensuring every bite is filled with that delicious banana flavor.
Step 5 – Layer the Bananas
Slice your ripe bananas and layer them evenly on top of the pudding. Fresh bananas add the necessary texture and sweetness, complementing the pudding beautifully. Make sure to cover the entire surface for maximum flavor.
Step 6 – Spread the Whipped Topping
Now it’s time for the whipped topping! Spoon it over the banana layer and spread it delicately. Ensure it covers all the bananas to maintain freshness and present a clean appearance.
Step 7 – Garnish if Desired
If you want to add a little extra flair, garnish with cherries on top. They provide a lovely pop of color and a hint of tartness that works well with the sweetness of the pudding.
Step 8 – Refrigerate to Set
Place the assembled bars in the refrigerator. They need to chill for at least 2 hours, allowing the flavors to meld and everything to set properly. The longer they chill, the better the flavors blend together.
Step 9 – Slice Into Bars and Serve
After chilling, remove the bars from the refrigerator. Use a sharp knife to slice them into squares. Serve them chilled for the best experience; the creamy texture will melt in your mouth.
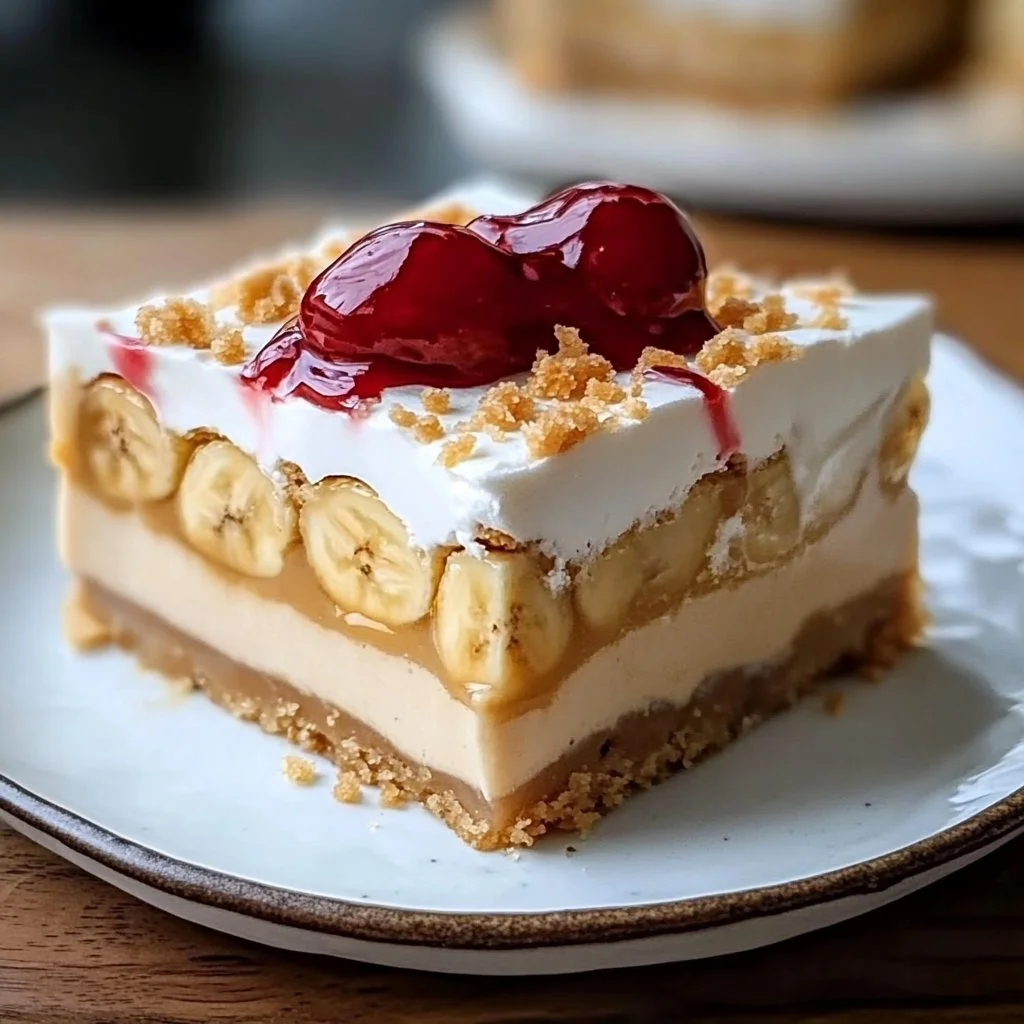
Serving Suggestions for Irresistible No-Bake Banana Pudding Bars
Best Occasions to Serve This Dish
Irresistible No-Bake Banana Pudding Bars are perfect for numerous occasions. They’re an ideal treat for summer picnics, providing a cool respite on hot days. Bring them along for potlucks or family gatherings, where everyone will appreciate the lightness and sweetness. They’re also great for holidays and special events, bringing a nostalgic touch for those who love banana pudding.
What to Serve With It
These bars pair nicely with a variety of beverages, such as iced tea, lemonade, or coffee for an afternoon treat. If you’re looking for sides, consider serving them alongside fresh fruit skewers or a light salad. They also complement a scoop of vanilla ice cream or a drizzle of chocolate sauce on the plate.
How to Store Irresistible No-Bake Banana Pudding Bars Properly
Best Storage Practices
Store your leftovers in an airtight container in the refrigerator. They can last up to 3-4 days, though they are often best eaten within the first few days for optimal freshness. Ensure that the bars have minimal exposure to air to prevent any moisture buildup on the whipped topping.
Reheating and Freezing Tips
Since these bars are meant to be served chilled, reheating is not necessary. If you want to freeze them, slice them before freezing in a single layer on a baking sheet. Once they’re frozen, move them to a freezer-safe container with parchment paper between layers to avoid sticking. They can last in the freezer for up to 2 months, but keep in mind that bananas may brown over time.
Tips & Tricks for Irresistible No-Bake Banana Pudding Bars
Mistakes to Avoid
- Overmixing the Pudding: Stir just until thick to maintain a smooth texture.
- Not Crushing the Wafers Enough: Ensure the wafers are crushed finely for a sturdy crust.
- Using Unripe Bananas: Choose ripe bananas for maximum sweetness and creaminess.
- Skipping the Chilling Step: Don’t rush; chilling is vital for the right texture.
- Not Greasing the Pan Properly: Greasing prevents sticking, making it easier to remove the bars.
Extra Tips for Better Results
For enhanced flavor, consider adding a hint of vanilla extract to the whipped topping or pudding. Adding a sprinkle of cinnamon or nutmeg can also elevate the taste. For presentation, slice the bars neatly and serve with a mint leaf on top for a fresh touch. If you’re feeling adventurous, layer in some chocolate chunks for a delightful twist.
Recipe Variations of Irresistible No-Bake Banana Pudding Bars
Creative Twists
- Chocolate Lovers’ Delight: Substitute chocolate pudding for the banana pudding and layer with mini chocolate chips for an indulgent treat.
- Tropical Edition: Add crushed pineapple between the pudding layers for a refreshing tropical flair.
- Nutty Banana Bars: Incorporate chopped nuts into the crust for a crunchy texture that complements the creaminess of the bars.
- Layered Fruit Medley: Mix other fruits such as strawberries or blueberries with the bananas to create a beautiful and vibrant dessert.
Dietary Adjustments
To make these bars vegan, use almond milk and vegan whipped cream. Opt for plant-based vanilla wafers, ensuring all ingredients adhere to dietary preferences. For gluten-free options, simply swap in gluten-free wafers and make sure your pudding mix is free from gluten.
Conclusion about Irresistible No-Bake Banana Pudding Bars
Irresistible No-Bake Banana Pudding Bars are not just a dessert; they’re a celebration of flavors and textures that come together in the simplest form. This recipe combines the nostalgic allure of banana pudding with modern convenience, making it accessible for everyone. Whether you’re an experienced baker or a kitchen novice, these bars promise a delightful experience. With minimal effort, you can create a dessert that brings joy and satisfaction to any gathering. So why wait? Gather your ingredients and dive into this scrumptious world of no-bake banana pudding bars—you won’t regret it!
FAQs about Irresistible No-Bake Banana Pudding Bars
How long can I store Irresistible No-Bake Banana Pudding Bars?
You can store them in an airtight container in the fridge for up to 3-4 days for the best quality.
Can I make these bars ahead of time?
Yes! These bars are perfect for making a day in advance. Just keep them in the refrigerator until you’re ready to serve.
Is it possible to freeze Irresistible No-Bake Banana Pudding Bars?
Yes, you can freeze them. Slice them first and store in a freezer-safe container. They can last for up to 2 months.
Can I substitute the pudding mix for another flavor?
Definitely! Feel free to substitute with chocolate or vanilla pudding according to your taste preference.
What can I use instead of whipped topping?
You can use homemade whipped cream or coconut whipped cream as a dairy-free alternative.
How do I avoid bananas turning brown?
To protect the bananas from browning, you can sprinkle a little lemon juice over them before layering.
Can I add toppings like nuts or chocolate chips?
Absolutely! You can customize your bars with any toppings or mix-ins you enjoy.
What size pan should I use for this recipe?
A 9×13 inch baking dish works best, providing enough room to layer all ingredients comfortably.
No-Bake Banana Pudding Bars
Ingredients
For the crust
- 1 package vanilla wafers Crushed for the crust
- 3 tablespoons melted butter For crust mixture
For the filling
- 2 cups banana pudding Prepare according to package instructions
- 2 cups whipped topping Can be store-bought or homemade
- 2-3 pieces ripe bananas Sliced
For garnish (optional)
- as needed cherries For topping
Instructions
Preparation
- Gather all your ingredients.
- Crush the vanilla wafers in a food processor or by placing them in a ziplock bag and smashing.
- Melt the butter in the microwave or on the stovetop and set aside.
Combine Crust
- Combine the crushed wafers with melted butter in a mixing bowl.
- Press the mixture firmly into the bottom of a greased pan to form an even crust.
Prepare Filling
- Prepare the banana pudding according to the package instructions, stirring constantly until it thickens.
- Pour the pudding over the vanilla wafer crust and spread evenly.
- Layer the sliced bananas on top of the pudding.
Finish Bars
- Spoon the whipped topping over the bananas and spread delicately.
- Garnish with cherries if desired.
- Refrigerate for at least 2 hours to chill and set.
- Slice into bars and serve chilled.